When you are deep in the backcountry, navigating technical rock gardens, or kicking up dust on remote overland trails, reliable communication isn’t just a convenience—it is a critical safety requirement. Once you drop into a canyon or cross the ridge line, your smartphone quickly becomes an expensive paperweight.
For decades, off-roaders relied on CB (Citizens Band) radio, but weak signals, massive antennas, and terrible audio quality have largely pushed it into retirement. Today, the modern standard for vehicle-to-vehicle communication when cell towers and repeaters are completely out of range is GMRS (General Mobile Radio Service).
Transitioning to GMRS provides your group with professional-grade clarity and power. This guide will help you architect a redundant communications rig that ensures you stay connected even when you are hundreds of miles from civilization.
The Core Philosophy: Simplex vs. Repeaters
When you are deep in the wilderness, you cannot assume you will have access to a repeater infrastructure. While repeaters like you can find on myGMRS.com offer incredible coverage, true off-road vehicle-to-vehicle communication relies on simplex mode—radio-to-radio, line-of-sight transmission.
Because GMRS operates on the UHF (Ultra High Frequency) spectrum, its waves excel at cutting through dense foliage and bouncing around rugged terrain. However, UHF is strictly line-of-sight. If there is a massive granite mountain between you and the tail rig, your signal will struggle. To overcome this environmental bottleneck, your setup needs raw power, a perfectly tuned antenna, and strategic hardware placement.
The Primary Rig: High-Power Mobile Radios
While a handheld radio (HT) is great for a spotter stepping outside the vehicle, it shouldn’t be your primary communication lifeline inside the cab. A vehicle’s metal body acts as a shield (a Faraday cage), severely degrading a handheld’s weak 5-watt signal.
Your primary rig should be a hardwired Mobile Radio capable of pumping out 15 to 50 watts of power.
Why Mobile Radios Rule the Trail:
- Massive Power Output: Pushing up to 50 watts compared to a handheld’s 5 watts means your signal can punch through terrain and obstacles that would completely swallow a weaker transmission.
- Permanent Power: Tied directly to your vehicle’s 12V battery system, ensuring you never have to worry about a dying radio battery in an emergency.
- Superior Audio: Built-in loudspeakers and heavy-duty hand mics ensure you can hear transmissions over rugged tire hum and engine noise.
Pro Tip: When wiring your mobile radio, always run the power leads directly to the vehicle’s battery rather than tapping into an existing accessory circuit or fuse block. This significantly minimizes alternator whine and electrical interference from your vehicle’s engine management systems.
The Antenna Setup: Where the Magic Happens
You can buy the most expensive 50-watt radio on the market, but if it’s paired with a cheap, poorly placed antenna, it will perform worse than a cheap handheld. Your antenna is the single most important factor in determining your real-world trail range.
1. The Ground Plane Matters
For a standard antenna to radiate efficiently, it requires a metal surface underneath it to act as the second half of the antenna system (a ground plane). The absolute best location for an antenna is the dead center of a metal roof.
2. Overcoming No-Ground-Plane (NGP) Barriers
If your vehicle has a fiberglass hardtop, a soft top, or you are mounting the antenna to a ditch light bracket or a rear tire carrier, you lack a proper ground plane. In these scenarios, you must use a specialized No-Ground-Plane (NGP) or ½-wave antenna, which is engineered to operate independently without relying on the vehicle’s metal chassis.
3. Tuning for Peak Performance
Every antenna installation should be verified using an SWR (Standing Wave Ratio) meter. An SWR reading above 2.0 indicates that power is reflecting back into your radio instead of broadcasting out into the wilderness, which can permanently damage your hardware. Aim for a clean ratio as close to 1.1 as possible.
Recommended Hardware & Trail Gear
To build out a bulletproof communications setup, look to industry-leading affiliate partners for components that withstand brutal vibrations, dust, and moisture.
The Heavy-Duty 50-Watt Mobile Base
For the center of your dashboard build, you want maximum legal power. Look for a ruggedized, dust-proof mobile radio with a detachable faceplate for clean mounting in tight modern truck interiors.
Purchase Guide
BTECH GMRS-50PRO
The BTECH GMRS-50PRO is a powerhouse mobile unit that bridges the gap between traditional GMRS radios and modern technology. It offers true 50W output, a feature-rich "Connected Mic" UI, and a Bluetooth app interface that makes complex programming remarkably simple for experienced users managing large channel lists or repeater tones.

The Flexible “Ditch” or Roof Antenna
On the trail, low-hanging branches will mercilessly beat your rig. Avoid stiff, fragile fiberglass antennas. Opt for a heavy-duty NMO-mount spring antenna or a flexible whip that can take a beating and flex out of the way.
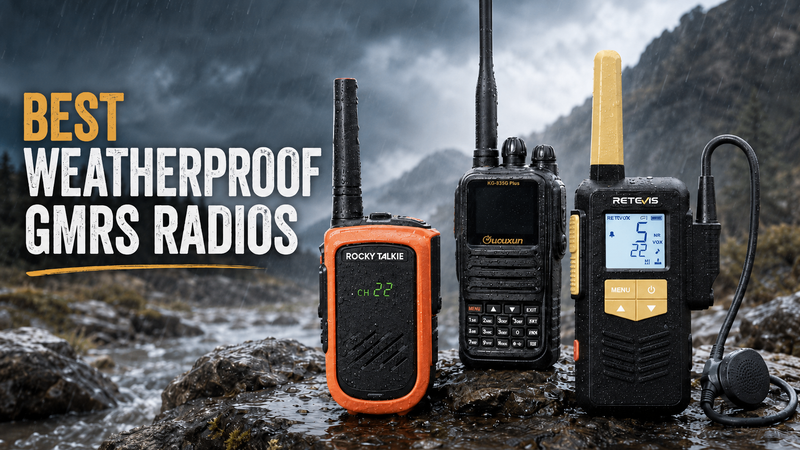
The Secondary / Spotter Handheld
When your co-driver steps out of the truck to guide you over a tricky rock ledge, they need a rugged, waterproof handheld that shares the exact same channel configurations as your mobile rig.
Redundancy: The Backup & Emergency Ecosystem
A single point of failure is a recipe for disaster when overlanding. The ultimate setup incorporates layers of backup communication to handle any worst-case scenario.
| Tech Layer | Best Used For | Power Source | Range Capability |
|---|---|---|---|
| High-Power GMRS Simplex | Vehicle-to-vehicle trail convoy coordination | Vehicle 12V Battery | 2 – 10+ miles Line-of-Sight |
| GMRS Repeater | Reaching regional help or checking trail conditions | Vehicle 12V Battery | 10 – 40+ miles Requires infrastructure |
| Rugged Handheld (HT) | Spotting, recovery operations, or basecamp use | Internal Li-ion Battery | 1 – 3 miles Varies heavily by terrain |
| Satellite Messenger | True medical emergencies or vehicle breakdowns | Internal Battery | Global Requires active subscription |
Pro Tip: Program a dedicated “Emergency Channel” across all handhelds and mobile units before leaving the staging area. Ensure everyone in your convoy knows how to switch to this channel instantly, bypassing privacy tones (CTCSS/DCS), which can block out emergency transmissions from outside parties trying to reach you.
Final Checklist Before Hitting the Trail
Before you shift into 4-Low and lose cell service, run through this quick operational checklist to ensure your comms are functioning perfectly:
- Check Antenna SWR: Ensure the coax cable hasn’t been pinched or compromised during recent modifications or trail runs.
- Disable Privacy Tones for Convoy Comms: Ensure all vehicles are using “Open” channels unless explicitly coordinating on a private frequency, avoiding missed transmissions from lagging rigs.
- Charge Handheld Backups: Keep spotter radios sitting in their 12V charging cradles inside the cab so they are topped off and ready at a moment’s notice.
- Sync Frequencies: Confirm that every driver has their radio programmed to match your primary trail channel and backup channels.
By investing in a high-power mobile GMRS unit, optimizing your antenna placement, and keeping a rugged handheld ready for ground operations, you ensure that your vehicle stays connected, coordinated, and safe—no matter how far off the map you wander.
Purchase Guide
PolyPhaser Lightning Arrestor
Coax Surge Protector